 Figure 7
| Back Page | Next Page | Robotics Home Page | Secure Order Form |
To operate the device first pressurize the system using the foot pump. This only takes about 4 strokes to reach 50 psi. Your mileage may vary depending upon the size of the PET bottle you are using.
Open the three way air valve to charge the air muscle. The muscle should immediate contract. You can measure the distance it moves in proportion to the psi gauge on the pump. You should be able to operate the muscle through four or five contractions and expansions before you need to re-fill the PET bottle. The air muscle doesn't use much air.
If the muscle doesn't appear to contract, it probably wasn't stretched far enough. Remember the muscle must be stretched to operate.
Second Mechanical Device
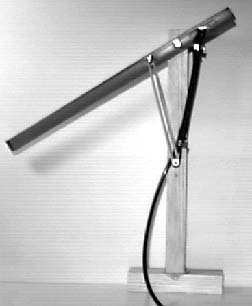
The second device we will build is a lever (see figure 7). The lever I made is constructed out of wood and plastic. Machine screws secure the air muscle and rubber bands to the lever arm. A wood screw through the plastic arm is the pivot. A second wood screw holds both the air muscle and rubber band. Operate this device using the three way air valve as before. When activated the lever moves up.
Figure 7
| Back Page | Next Page | Robotics Home Page | Secure Order Form |